The enrobed wrap is complete - I even took it out for a test drive at a meeting last night. It went great. I am really happy with my first seamed sweater and feel great about moving forward in making modifications to sweaters to fit my body. Knitting this sweater - while not perfect - was blissful for the learning process alone.

This is my practice sweater, my first seamed sweater ever, and I learned a tremendous amount. My goal for this first project was to knit a relatively plain/simple sweater, but one that looks smashing on me and my body. And while I didn't exactly meet or exceed that goal, I came close. And the bonus is that I know so much more for when I knit my next sweater.
Some quick notes on modifications before I get to the lessons:
* I shortened the torso by 2 and 1/2 inches and sleeves by 6 and 3/4 inches.
* The sleeve details called for one stitch change on each side of every other row, I did two.
* I made the edging about 3/4 inch instead of 1 inch.
* For picking up sts along the neckline I did a repeat pattern of *pick up 3, skip 1, pick up 2, skip 1*

And my lessons:
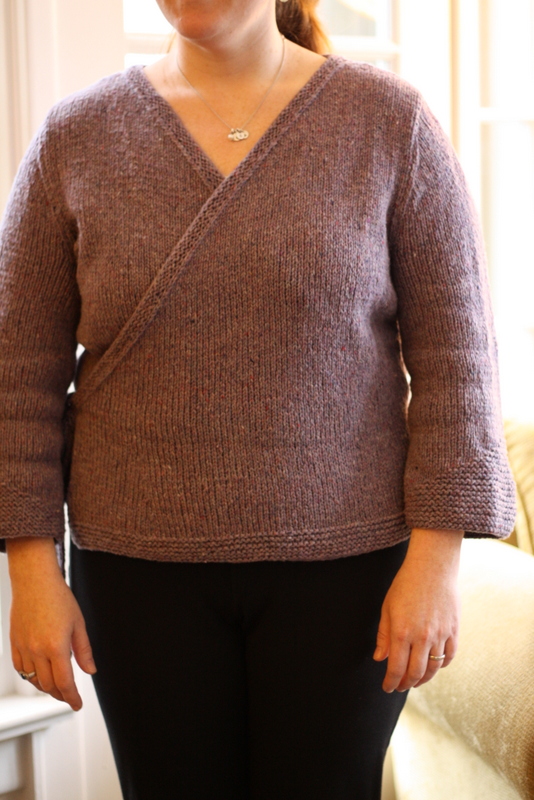
1) For my body, when taking length from the torso, I should probably take some from all over and not just the bottom. I think this is evident by the bit of extra bunching fabric under my arms and around my back. I am really happy with the overall length - so I did take out the right about of overall length - but there seems to be some extra fabric between my waist and shoulders. I could probably have left a bit of length at the bottom, and taken 3/4 or an inch from the upper chest.
2) I should also have simultaneously done more shaping with the neck line. And that stands to reason - if I shorten the length, but keep the diagonal line the same, it will simply shift upwards instead of becoming more steep. It looks fine, but I would have liked a bit more reveal and steeper 'v' shape. I could have accomplished this with a more rapid decrease along the neck line, but didn't realize this as I was working through the pieces. You learn as you go, right?
3) A steeper neckline could also have brought my upper arm seam higher so it sits more on top of my shoulder instead of slightly over. I think this would help with the overall shaping of how the sweater 'hangs' on my body.

4) Sleeves always need to be set in on center with the shoulder seam. In the photo above you can see where I off-set it by 3/4 inch (due to a slight differential in length between the front and back panels). I shouldn't have done this, but it was my practice sweater and felt that I'd give it a try and see what happens. Only a critical eye would notice this - and strangely it doesn't bother me at all - so I am leaving it and will wear it as is. (The other shoulder and sleeve line up perfectly.) Also, since you can block to even out length it likely wouldn't have made a difference in the end. But again, learn as you go.

5) Little shaping stitches make a big difference - and a good
difference! I am so happy with how just a few increases or decreases
can make such a difference in fit and accommodate (accentuate!) curves.
6)
I still need to work on sleeve length. I tried to go for 3/4 sleeves,
but after washing they crept longer. They look nice, but I wonder if a
shorter sleeve, ending at my waist where I am narrowest, would have
looked more balanced?

7) Take notes, draw new schematics based on new measurements, and make changes as you go along. I did this a lot and it really helped me to get into the pattern and understand it. Rather than reading the pattern as text, I was able to interact with it and while there were measurements and stitch counts, on paper I could play around with changes and see what might happen - I could make changes to suit the project I was working on. Amy's reference section on modifications was invaluable in doing these exercises, and having worked through them once feel that I can do even better, more detailed work the next time around.

Overall a fantastic first seamed sweater for me. I love the color (most true in the second photo) and will wear this often. I know
now there are things that I could have done differently with this sweater, but I never would know to do them
had I not knit it in the first place. Onward with an adventuresome spirit I say (as does Amy in her fantastic presentations!)