Thursday, December 26, 2013

Gift giving


This gift started over 5 years ago.  In September of 2008 I finished the quilt top (you can follow the posts backwards here).  I am not sure why I ultimately folded it up and put in on the shelf.  Maybe it felt too big to quilt myself?  I had the batting, the backing and top done, but never got around to finishing it.


This past fall I have had to prioritize my time in a way that is different from the years and months past.  No longer am I crafting to take a break from writing my dissertation.  Likewise I am not crafting to fill my days with something other than baby food and diapers.


Life has shifted in our household: we have four growing daughters now - no babies anymore - and no plans for more children.  I have gone back to work teaching and am spending the remainder of my time this year volunteering at their school.  I know that life balance is ever shifting and precarious.  This past fall tilted more towards the computer/classroom/meeting end-of-things and less towards the sewing machine/knitting needles/making end-of-things. 


This fall, however, I re-discovered this work from many years ago and called upon a neighborhood friend for help.  She is an incredibly accomplished quilter and after seeing my work agreed to complete the project for me.  I left her with the top, batting and backing.  Two weeks later I went back to her house and picked up this beauty.

There is history behind this quilt.  Briefly, the backing fabric was a cover for a blanket that was kept at our family cabin for many years.  It used to be bright fuschia, but faded in the sunlight.  I salvaged the fabric for later use when the cover developed a big rip down the middle.  More than this, however, is the additional story layer added by my friend that helped finish it.  She added a heart patch to the back - covering a small hole - that gives it the extra touches that will be discovered, and re-discovered in years to come.

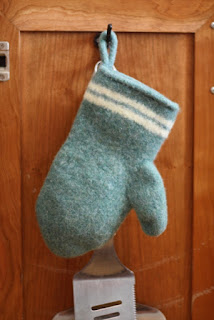
I intended the quilt go back to the cabin, but my Mom wants to keep it around the house instead.  I don't blame her - it did turn out quite nicely.  This, along with a pair of upcycled wool mittens, were the only hand-made presents I gifted this season.

Tuesday, December 10, 2013

WIP's: cowl, shawl and socks

There are three projects on the needles as of today...

First is a pair of socks for DH.  I made him a pair a year ago this past September.  He wears that pair quite a bit, but they are loose fitting socks owing to the seed stitch ribbing.  This current pair has a more traditional k1, p1 ribbing with some decorative cables.  Yes, the socks are still brown (his favorite color), but it means I know he will wear them.  And the cables make me happy to knit them.  The colors in photos aren't quite right - they are a lovely shade of light fawn brown.


The next is a cowl that was started in a fit of boredom, the yarn has fantastic colors, but I am not sure that I am going to love the final product.  I think this will be a gift for the girls' piano tutor who is learning to knit herself.  I know she'll appreciate it and the colors will suit her quite well.


And last are the lingering honeycomb socks.  I have one done and one to go but I can't seem to get motivated to start that second sock.  Not sure why.  They look pretty cool, no?


Thursday, December 5, 2013

FO: Daybreak


It has been too long since I was here in this space last.  

I have been knitting however.  I finished Daybreak a while back with two skeins that I picked up at the WI Sheep and Wool Festival. 

It is a wonderful knit - lightweight but substantial, hip but understated, eye-catching but not too busy. 


Based on the way this shawl is knit you can either block it with points, or go for a more rounded edge.  I tried the latter.  I had some points saved up at my LYS and put them towards the purchase of a set of blocking wires.  What a wonder they were to work with - and they gave me the promised rounded edge I was hoping for.

I have gotten many compliments on this shawl and am now tempted to try one of the other asymmetrical pattens - maybe Chadwick

Tuesday, October 8, 2013

ISO good sampler pattern


I don't know if it is the fall weather, nostalgia or what.  I am feeling drawn to older cross stitch sampler patterns lately.  But I am stuck and can't seem to find one that 'speaks' to me, my family or our experiences.  I've searched Etsy, Ebay and various websites, but am not coming up with anything.  In the meantime I have started work on "Peace on Earth" by Blackbird Designs.

Any suggestions from folks out there?

Wednesday, October 2, 2013

FO: Vignette


I finished up Vignette (by Amy Herzog) a couple of months ago, but hadn't taken any photos of it until this past week.  I am really happy with how this sweater turned out - the fit is nice, but a tad on the short side (my error).  I also could probably have made it a bit more snug around the middle.

Overall a lovely knit - great patterning - and the yarn was a great match for this sweater.  I am happy with the sleeves as well and did the set-in properly this time.


The buttons came from The Sow's Ear.  They are not something I would typically select for a sweater, but I think they work well with this one.


With the chilly fall weather arriving its time to select another sweater to begin work on.  Maybe another wrap sweater?


Monday, September 16, 2013

WI Sheep and Wool Festival: through kid eyes

This year I took my oldest daughters with me to the WI Sheep and Wool Festival in Jefferson, WI. 

One of my twins loves dogs and as I suspected she loved watching the herding trials. 


My other oldest has lots of interests and is game for most any experience so she found delight in the sheep shearing, lambing, yarn, food - you name it and she was cool with it.


We had a nice time looking through the vendor barns, having lunch and taking in the sights.  I may have just found my very own festival-going companions for the next few years (smile).


In only came home with a few yarns - I already cast on the two from Sun Valley Fibers for Daybreak
- but I also picked up some beautiful earrings from Jennie the Potter and a shawl pin.  Overall it was a great day and am looking forward to next year.

Wednesday, August 14, 2013

FO: Habitat

older daughter modeling the hat (a bit big on her, and a bit big on me too)


My first extended cable project!  My finger joints are sore, but only because it is more manipulation with needles than I am used to.  The hat turned out perfectly (no mistakes!) owing mostly to the pattern/charting which was spot on.  It's a very popular Jared Flood pattern - Habitat - and I highly recommend it.  With a 22-inch noggin + ponytail I decided to knit the size Large, but probably would have been fine with the small too.

The hat is knit from more of the left over Peace Fleece (2 other projects here and here) and the color is lovely, lovely, lovely.

cables!


Not sure what is coming up next; nothing but a few uninspiring, half-finished socks on my needles at the moment.  Lots to do and organize with a new school year arriving - my own kids, the PTO and teaching a class at the university this fall.  Maybe it's time to put down the needles and hit the books for a bit instead?!

Wednesday, August 7, 2013

FO's: Birthday knitting

colorway: peach melba

A couple months ago I agreed to help a friend teach 18 7-year-olds how to knit at a birthday party.  I am not sure how successful we were, but many of the girls seemed really happy with their introduction to knitting - my daughters included.

As a thank you my friend gifted me a very generous gift certificate to the store that hosted the party, a local yarn/fabric shop Stitcher's Crossing.  My girls, excited by their brief introduction to knitting, eagerly picked out a couple skeins of yarn for themselves.

And then the skeins sat.

I am not one to push knitting on my kids - it wouldn't end happily for any of us - but the lovely skeins they picked out (they have very good taste in yarn) were eating away at me.

As it turns out, their own birthday is coming up in a few short days and I convinced them each to let me knit up a quick project with their special yarn.  We talked it over and daughter #1 wanted a cowl and daughter #2 asked for a hat.  Easy peasy. 

colorway: royal


And, as I promised them, there is half a skein left to practice their knits and purls if they so choose.  Now if that yarn sits for another month I may try to convince them that they each need both a hat and cowl...they are such easy and gratifying projects I'd love to knit those up for them too.

The yarn is Manos del Uruguay Maxima - the cowl is 75 sts in the round with single purl rows at 5 rows in from each end, and the hat is the Vanilla Twist Hat, substituting cables for a rib edging.


Thursday, August 1, 2013

FO: Hildina


It has been a cool summer - which prompted me to put aside my sock knitting and take up a bigger project.  I pulled out a very special skein of unknown fiber and unknown origin that was given to me by my husband for the holidays.  The sport weight wool is heavy, but it made the most loveliest of lacework shawls.

This was my first attempt at lacework and I did ok with it.  I had to frog it a few times, ripping back up to six rows of knitting in an attempt to re-work mistakes with yarn overs and - most especially - the 3-into-7 stitch.


Once I got it sorted the shawl came together quickly and blocking it made a nice difference.  The yarn really opened up and and the lace panels blossomed.  I do wish I knew more about blocking lace and I have a feeling the some weights at the points would have helped give it a bit more shape.


Overall it is a great pattern and lovely finished piece.  I am excited to wrap up in it as the temps fall this autumn (or even tomorrow night).


Wednesday, June 12, 2013

Almost Summer


poppy blooming in front yard

It was spring...and now it's almost summer.  The kids get out of school tomorrow, schedules will change with new activities and adventures.  Knitting has been on the back burner for me lately - final grades for my course were due, we're finalizing mudroom addition plans with our architect, I moved into Co-Chairing our public elementary school PTO (I did what?!), and my husband made partner at his law firm.  It's been a crazy couple of weeks.  But I am moving ahead with Vignette.  I've completed the back, both front panels and 3/4 of one sleeve.  Just a bit more to go before blocking and seaming.  Can't wait to show the results when it's done!

Wednesday, April 24, 2013

Bird's Egg (it's spring!)


I came across the four little eggs above rolling around in the bottom of a long-forgotten project bag (they were the left overs from when I knit this gift for a friend a few years ago).  What a delightful surprise to find this spring - it has been a wait for the warm temperatures, but it seems they may have finally arrived. 

I quickly dug out the old pattern for the bird's nest pincushion and whipped up the nest in a mere 90 minutes (much of that was stress-relief knitting so it moved very fast!)  It has quickly become a favorite item in the house, picked up and carried around by all the girls.  Sometimes the nest is a soup bowl, sometimes a frisbee, but the eggs always find their way back home.

I had knit the nest while waiting for new yarn to arrive for my next sweater, Vignette by Amy Herzog.  The color I chose is almost identical to the egg-shell blue above - but this new yarn is bird's egg in lark (worsted) by Quince & Co.  I have knit two patterns from this company before and this is the first time I've used their yarn.  It's lovely to knit with so far and I'm sure it will show off the lace detail in the sweater perfectly.  

bird's egg by quince & co. (lark)


I am actively working to incorporate the lessons I learned from my first customized, seamed sweater (see below) into this new garment.  I picked this next sweater in hopes of making a sweater with a deep v-neck and closer fit all around. Wish me luck!

Wednesday, April 10, 2013

Bliss!


The enrobed wrap is complete - I even took it out for a test drive at a meeting last night.  It went great.  I am really happy with my first seamed sweater and feel great about moving forward in making modifications to sweaters to fit my body.  Knitting this sweater - while not perfect - was blissful for the learning process alone.


This is my practice sweater, my first seamed sweater ever, and I learned a tremendous amount.  My goal for this first project was to knit a relatively plain/simple sweater, but one that looks smashing on me and my body.  And while I didn't exactly meet or exceed that goal, I came close.  And the bonus is that I know so much more for when I knit my next sweater.

Some quick notes on modifications before I get to the lessons:

* I shortened the torso by 2 and 1/2 inches and sleeves by 6 and 3/4 inches.
* The sleeve details called for one stitch change on each side of every other row, I did two.
* I made the edging about 3/4 inch instead of 1 inch.
* For picking up sts along the neckline I did a repeat pattern of *pick up 3, skip 1, pick up 2, skip 1*


And my lessons:

1) For my body, when taking length from the torso, I should probably take some from all over and not just the bottom.  I think this is evident by the bit of extra bunching fabric under my arms and around my back.  I am really happy with the overall length - so I did take out the right about of overall length - but there seems to be some extra fabric between my waist and shoulders. I could probably have left a bit of length at the bottom, and taken 3/4 or an inch from the upper chest.

2) I should also have simultaneously done more shaping with the neck line.  And that stands to reason - if I shorten the length, but keep the diagonal line the same, it will simply shift upwards instead of becoming more steep.  It looks fine, but I would have liked a bit more reveal and steeper 'v' shape.  I could have accomplished this with a more rapid decrease along the neck line, but didn't realize this as I was working through the pieces.  You learn as you go, right?

3) A steeper neckline could also have brought my upper arm seam higher so it sits more on top of my shoulder instead of slightly over.  I think this would help with the overall shaping of how the sweater 'hangs' on my body.


4) Sleeves always need to be set in on center with the shoulder seam.  In the photo above you can see where I off-set it by 3/4 inch (due to a slight differential in length between the front and back panels).  I shouldn't have done this, but it was my practice sweater and felt that I'd give it a try and see what happens.  Only a critical eye would notice this - and strangely it doesn't bother me at all - so I am leaving it and will wear it as is.  (The other shoulder and sleeve line up perfectly.)  Also, since you can block to even out length it likely wouldn't have made a difference in the end.  But again, learn as you go.


5) Little shaping stitches make a big difference - and a good difference!  I am so happy with how just a few increases or decreases can make such a difference in fit and accommodate (accentuate!) curves.

6) I still need to work on sleeve length.  I tried to go for 3/4 sleeves, but after washing they crept longer.  They look nice, but I wonder if a shorter sleeve, ending at my waist where I am narrowest, would have looked more balanced?


7) Take notes, draw new schematics based on new measurements, and make changes as you go along.  I did this a lot and it really helped me to get into the pattern and understand it.  Rather than reading the pattern as text, I was able to interact with it and while there were measurements and stitch counts, on paper I could play around with changes and see what might happen - I could make changes to suit the project I was working on.  Amy's reference section on modifications was invaluable in doing these exercises, and having worked through them once feel that I can do even better, more detailed work the next time around.


Overall a fantastic first seamed sweater for me.  I love the color (most true in the second photo) and will wear this often.  I know now there are things that I could have done differently with this sweater, but I never would know to do them had I not knit it in the first place.  Onward with an adventuresome spirit I say (as does Amy in her fantastic presentations!)

Friday, April 5, 2013

Getting close!


All the pieces are knit and now for the seaming.  With some sage and experienced advice from a friend I feel ready to tackle it!

Wednesday, March 27, 2013

Spring Break: Enrobed Wrap + V Junkie


It is the middle of spring break for our kids and it feels nothing like spring around here.  The snow is still densely on the ground, ice is packed over grass, and the temperatures are more suited to hot cocoa and fires in the fireplace than trips around the block on a bike.  We are also having our house insulated this week (at almost 100 years old we felt it was time to bring in additional reinforcements).  

All this means that I am tricking myself into thinking that I will still need a sweater yet this season and thus working quite diligently to complete the Enrobed Wrap (a side-tie wrap sweater) by Amy Herzog.  After trying on a lot of sweaters at her workshop, I fell in love with her other wrap sweater pattern - the Striper Cardigan - but thought I would stretch my wings on a sweater that was a bit more straightforward first.  There's no color work on this one, and it is knitting up at a larger gauge.  I figure I can get things worked out on this one and move onto the next one with more confidence.

I am really pleased with how this wrap is turning out so far.  I am trusting my measurements and modifications and so far it seems to be working quite well.  The back and front left panel are complete and when I hold them up to myself they fit nicely, not too wide or too long.  The increases and decreases are in the right places; the seams match up.

This method of piecing a sweater - knitting it in separate pieces and sewing it together at the end - is new to me and I am learning quite a bit as I go along.  I will give more detail when I write about the finished sweater.  So far, they mostly have to do with selvage and edging. (I haven't gotten to seaming yet!)


My other spring break project is V Junkie by Alice Yu (in Socktopus).  I had started with another of her patterns - they are all quite stunning with variegated yarns - but got frustrated after I had trouble following the pattern. So I abandoned it for another with a honeycomb design.  It looks pretty cool so far and is a much easier stitch pattern to follow.

The colors I have on the needles at the moment are reminiscent of dyed Easter eggs - maybe spring really is just around the corner.

Friday, March 22, 2013

FO: Kamchatka Sea Oven Mitt

 
Here's the gift for the friend.  A spunky oven mitt, knit up and felted using the left over Peace Fleece and some Wisconsin-grown, undyed wool yarn from a friend-of-a-friend.
 
The pattern is a freebie by Amy E. Anderson, Out of the Frying Pan.  I've used it quite a few times now and think it is great.  Each wool yarn has it's own felting properties (thickness, timing) and this one was no different.  I needed to trim all the stray wool hairs on this one, lest they catch on fire!  (Probably best not to use this one over an open flame). 
 
I wrapped this up with some homemade granola, and a hope that it adequately expressed my appreciation for her help.

Monday, March 18, 2013

Girl Scout Banner

 
After the girls graduated from daisies to brownies they needed a new banner for their troop.  I was happy to help with the process again and took my time sourcing a few special touches for this banner.
 
First, since I realized that the girls graduate every-other-year to a new level, I knew that I wanted a banner that could be with them for quite a few years.  As lovely as they are to make, they do require planning, time and resources, so if we can squeeze 4-5 years from this one I would be very happy.  The idea with this banner was to make one that wouldn't be dated in a year or two - something that could grow with the troop.
 
Secondly, I knew that I wanted something meaningful for the girls.  They are getting older now, and coming to appreciate and understand what it means to be part of a larger organization (like the Girl Scouts) and that it has ties to larger ideals and values beyond immediate friendship and play time.  To that end, I reached out to a neighbor that helped me create some custom fabric for our troop.  The words we used for the design came from the Girl Scout Pledge: honest, fair, friendly, helpful, considerate, caring, courageous, strong, responsible, respect, conserve, and sister.
 
Third, I again wanted to get the girls involved in the making.  The girls' participation (cutting and planting the daisies) in the first banner was a big hit and I'm all for getting crafty with kids.  It took some time to puzzle the best way to do this with the design idea I had (and I still had troubles, mostly owing to my own lack of planning) but everyone was able to participate and make a unique (albeit secret) contribution.
 
The design idea for the banner came from one of my familes' most cherished items: our birthday banner.  I made it just after my third daughter was born and it comes out for every birthday we celebrate (both young and old).  I really like the look of pennants - they can be festive, orderly, fun and when carried on a banner give a surprising amount of dimension and life to the design.
 
The background fabric was custom designed by my neighbor Emily of Bluestar Ink.  She has amazing skills.  When we first met I asked her to help me with the technical aspects of this project: finding fonts to create a .jpg file that I could upload, and scaling them to fit.  She took it to a whole other level and hand drew each word with custom fonts - they even personify the meanings of the words (which is not lost on the girls - they noticed how strong the word strong was right away!).  She then digitized each word, scaled each one to fit in a random pattern, confirmed the pantone color with me, and then sent me the file for uploading to Spoonflower for printing.  I ordered two yards and was thrilled with the quality of the final fabric.


The fabrics I chose for the front of the flags were off-the-rack fat quarters from JoAnn Fabrics.  Sometimes you just really luck out there (especially with the 50% off coupons!).  The backing is from an up-cycled queen size sheet.  Like the banner before this one, the top hem worked perfectly as the hanging pocket.  The dark brown for the backing and letters, and bright green for the pennant strips, are my nod to the traditional colors representing the girl scouts over the years.


I used stiff felt for the letters and cut them out free hand.  In hind sight I would like to have re-done those, but time got the better of me there.  That floating "R" will bug me every time I look at it!

 
For the personalized contribution from the girls I had originally thought of embroidery.  I envisioned each of the girls taking thread and needle and sewing their initials.  But then I got real and switched gears to glittery puffy glue.  While I am really happy with that choice (it was way more fun to execute) I didn't anticipate a few things: 1) The way dried glue would stick to my machine, 2) The girls' LOVE of the glitter glue, and 3) the drying time.
 
I wound up just sewing the tips of the flags together as many girls went all the way to the edges of the pennants with their glue and there was no way my machine could handle sewing through that.  I also had to run many of the points through the machine with parchment paper to ensure a smooth sewing surface.  Lastly, while the glue bottles stated a 4-hour dry time, that surely applies to conditions of normal use.  Many of our girls used the glue like frosting and piled it on (which I LOVE about each of them) but it meant that the three days I had set-aside for sewing the banner were dedicated to glue-drying time.

 
And what makes their contributions 'secret'?  Well, you can't see them unless you approach the banner and flip the individuals pennants up.  Each girls art is there, it's just behind the surface that you immediately see.
 
In the end - and with the help of a lot of fray check - I finished the banner with about an hour to spare before the annual St. Patrick's Day parade.  [The final blow was the realization that I made a banner suited for a 7.5 ft. tall person - because I didn't want to waste a bit of that precious two yards of fabric - so I had to cut it down to size for kids.  A hasty hemming job fixed that pretty quickly.] 
 
But it all came together.  I think it is a fun representation of our troop and vibrant reminder of how so many different parts (glue, fabric, design) can come together with a harmonious end.


Monday, March 11, 2013

Knit to Flatter

This past weekend I found myself surrounded by amazing wool sweaters, supportive women and an expert on how to make hand knit sweaters both fit and flatter every body shape.

we tried on A LOT of sweaters

 My LYS hosted Amy Herzog for her four hour Knit to Flatter workshop.  It was fantastic.

Because I don't pay much attention to fashion or commercial clothing design there are some fundamentals about dressing that have always eluded me.  I have a good sense of what colors look good on me, but cut and style?  That is a whole other ball game.  And the few hand knit sweaters that I have made, while lovely, haven't left me exactly excited about knitting more.  And this class taught me why.

First, I have leaned heavily towards raglan sleeve sweaters which, based on the method of increasing stitches, presumes your body is the same shape on the front that it is on the back.  Well, I haven't been that shape since before puberty!  And while they are arguably easier to knit up, they don't fit as well unless they are heavily modified to suit your shape.  And that is incredibly difficult to accomplish well when you knit your sweaters all in one piece.  If you deconstruct your sweater into parts you can focus your modifications where they are needed/necessary.  This allows you to make a custom knit, without too much pre-planning.  And the tailored look is always in...if your clothes fit they will almost always look good.  If they don't, well, then they won't.

Secondly, I have never understood the concept of ease in a knitting - I vaguely understood it to mean that negative ease would give you a tighter garment and positive ease a roomier one - but this class showed me exactly how to work with ease to match your measurements to a garments schematic, thus greatly increasing your chances of making a sweater that looks suited to you (vs. a sweater you are trying to fit into).

Lastly, during this class we took digital photos of our bodies, drew our outline and took a few measurements  - now I have a solid understanding of shape.  I am relatively proportional, but straight (as opposed to curvy).  It is not how I envisioned myself as I walked into the classroom, but upon leaving a light bulb had gone off and I realized why certain sleeve lengths and necklines look good on me while others most certainly don't.  Fantastic.  And I would almost call it magic, except Amy is wicked smart with the numbers and has obviously spent a tremendous amount of time and energy analyzing these issues.

my homework


Amy's book, Knit to Flatter, is full of patterns that will suit any body shape made in amazing yarns.  Each sweater features directions for how to customize for your particular body, including flattering shaping lines.  You can also access all her wisdom on her blog.

I have already ordered yarn (Shelter by Jared Flood!) to knit up a new sweater for myself.  My goal for this sweater is to spend a lot of time focused on shape and fit; to knit a relatively plain/simple sweater, but one that looks smashing on me and my body.  Armed with Amy's expertise I have more than half a chance at success!  Wish me luck.