Tuesday, December 23, 2014

Handmade Holidays


I took a break from knitting again - I had started on a pair of socks that I thought might be a gift for the holidays but my wrist really started to act up and I was having trouble doing yoga and pilates so I thought I would pull back from knitting for awhile.

Instead I turned to some mittens from up cycled sweaters, a new quilt block pattern and some lingering cross stitch patterns to help craft up the holidays.

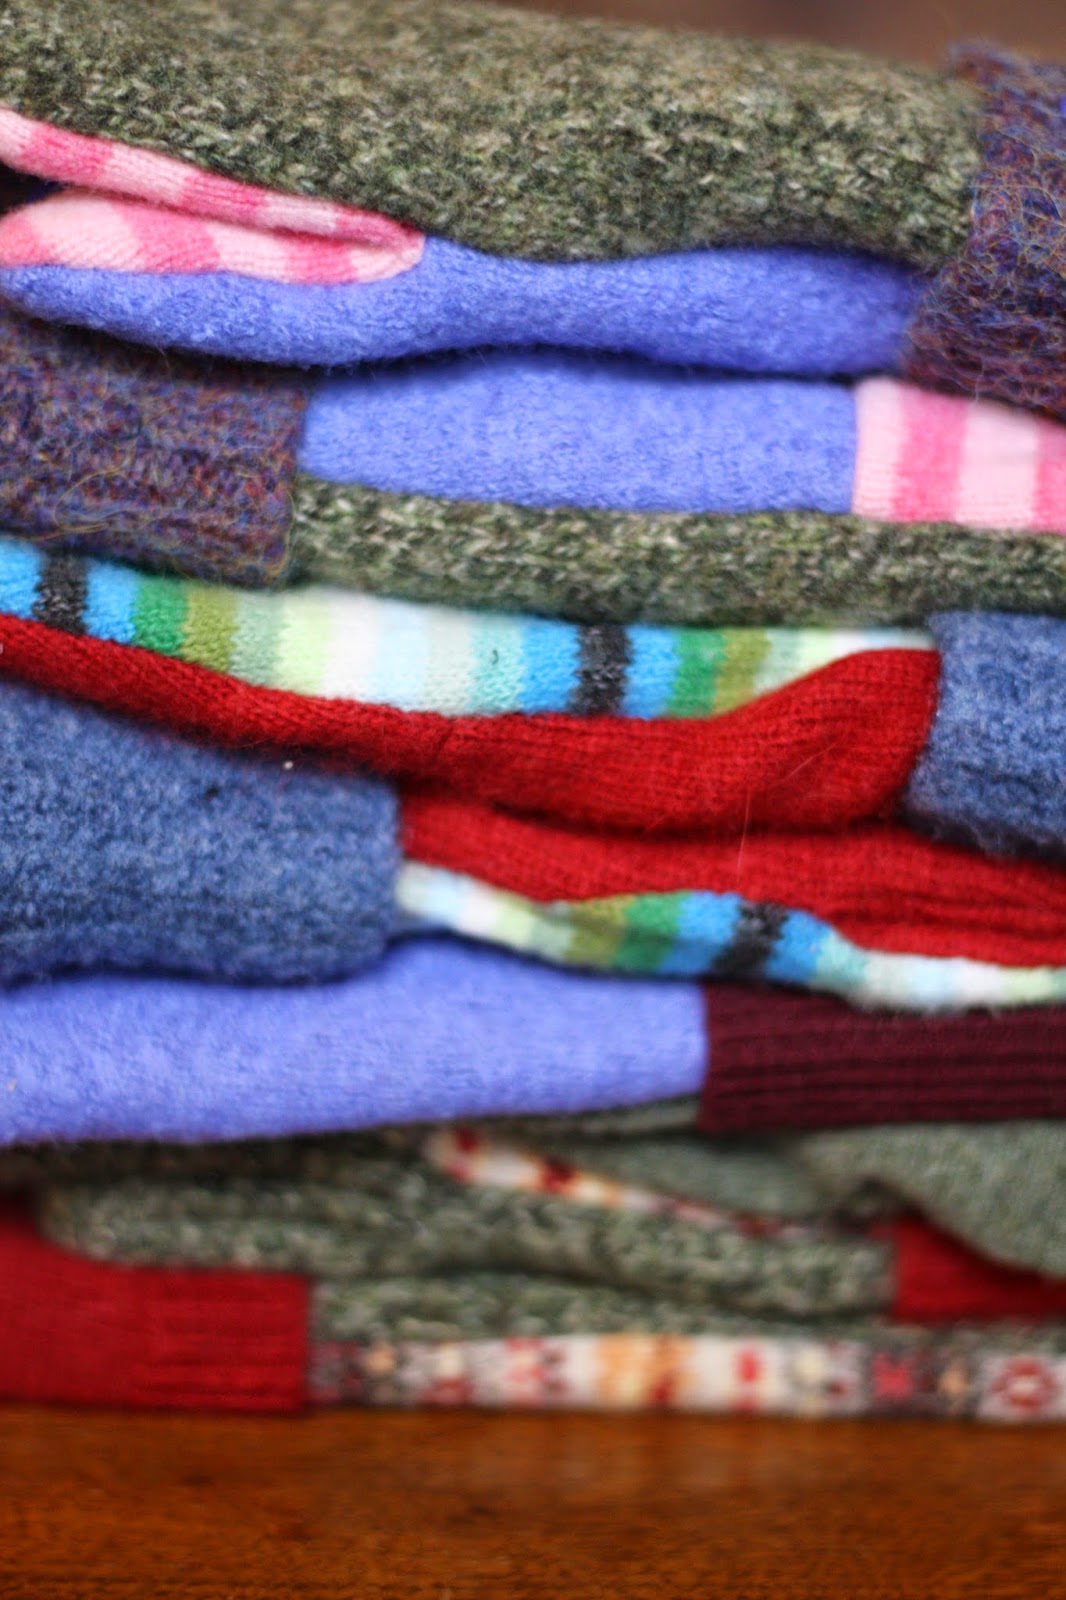
The mittens went to some special people that have been helping me out with a volunteer project over the past year.  I even used some felted handknit sock legs for the cuffs - they were dropped off by a sad neighbor that had felted her own socks and didn't want to look at them anymore.  I told her I had been there myself and gladly took them from her.  I am really happy that I was able to put them to good use in two new pair of mittens!  Each pair of mittens is lined with cashmere - a lovely addition that I discovered really makes the mittens enjoyable to wear.  I mean fleece liners are nice, but cashmere?  Wow.  I also got around to making cashmere liners for my tree mittens and have been wearing them most days this winter.  They are perfect.


I made these three coordinating tree wall quilts for myself, my Mom and my Mother-in-law for Christmas.  I was inspired by the patchwork forest tree tutorial by Diary of a Quilter and once I started making the blocks I couldn't stop!  I wound up with over 100 blocks after one weekend of sewing and from there it was just a matter of organizing the blocks into sets that were well coordinated.  I kept the one of the far right (next photo).


Each has a nice hanging pocket on the back and all were quilted with straight lines.


I also have never framed any of my small cross stitch patterns from over the years.  This Santa had been sitting in a box for a couple years and it was time to take it out and get it up on the wall.  I went to a big box store to get some custom mats cut that would fit off-the-shelf frames.  I then mounted the linen fabric on all natural cotton quilt batting (a recommendation from a local framing shop) and placed it in the frame for the wall.  Success!


I did the same with the Winterwoods ABC's from Alicia Paulson which finally got it's proper place in our hallway.

Next up for framing are the Peace on Earth cross stitch, our family pixel portrait and a recent color pencil drawing by my 7yo which she made during a recent trip to our local art museum.


And next up?  After gazing at my Winterwoods ABC's I logged back onto Alicia's blog/website to see what else she might have available...and the ornament kits are amazing.  Can I say that again?  They are a-maz-ing.  I just ordered Snow Day and can't wait to dive into making them after the craziness of the holidays subsides.

Wednesday, November 19, 2014

FO: In Threes for my 9yo


A simple little cardigan for my increasingly fashion-enthusiastic daughter.  She picked out the color and buttons with me at the store and I knit away until I had something long enough to fit her.

She loves it - but is also becoming more and more interested in sewing and design - it is really fun to see how she interprets her world and what is 'cool' and what is 'unique'.  So far she has worked almost exclusively in animal (cheetah) prints in bright colors.  Hmmm...

Monday, November 10, 2014

Icelandic Sweater Repair


Late this year I had the privledge of repairing another important sweater - this one from Iceland from a friend of a friend.

It is a lovely sweater - one that she purchased in Iceland from the Handknitting Association of Iceland.  Unfortunately her sweet dog got a hold of it one day many years later and put a hole in the yoke.  Luckily for me the hole was restricted to only the cream color yarn!

We worked together to order some more yarn and I did my best to repair the hole.  There were some other areas that were weakening so I also did my best to reinforce them in hopes the sweater will last for many more years.


I currently have a friend and her family living in Iceland for a year and at about the same time as I was working on this sweater her parents went for a visit.  She offered to bring back yarn for all of us and I put in an order for a women's sweater. 


I settled on Grettir by Jared Flood, but am following the schematic laid out for a standard pullover by Custom Fit to get (what I hope to be) a nicely proportioned sweater.  I have completed 1.25 arms so far (no pictures yet.  The body will be light gray with white, black and green accents in the yoke.  I  am excited to see where the designing/knitting process takes me next.


I think that my friend was happy with the repair - I should check in with her to see how it is holding up.  She called it her house sweater and since we've have many days in the negative degrees (F) I am sure that it is getting quite a bit of wear.


Sunday, November 2, 2014

FO: Happy Halloween


Three newly made costumes this year and one vintage.

One of my 9yo's went as a Tootsie Roll.  While we freestyle-sewed the 'roll' we spent some time making a lovely headband and ensuring that we had the right lettering.  My daughter cut the letters from a pattern (did you know that the Tootsie Roll font is really close to Cooper Black?), traced them onto fabric, cut them again and then glued them to her costume?  I am proud of my little DIY-er in training.  We also put together a cute headband with red ribbons and a real Tootsie Roll on top.

My other 9yo went as a cat - her favorite cat from the Warrior Book Series (by Erin Hunter), hence the yellow color.  I think the cats name is LionBlaze.

My 7yo wore a leopard costume that must have been sewn by my Mom in the very early 1980's.  I am amazed at how well it is holding up.  She wore a similar costume - also made by my Mom - last year too.

My 3.5yo is a snowy owl, inspired by her favorite animal and an article in Family Fun magazine.

The body suits for the owl and cat are from the patterns that are annually available by McCall's or Butterick for various Halloween costumes (lion, frog, dragon, cat, bear, etc.).  It is so easy to use that pattern as a base and then build off with details from there.  The cat really didn't have any additional details, but the snowy owl needed wings and the headpiece, both of which I borrowed on heavily from the Family Fun October 2014 issue.

Tuesday, October 28, 2014

FO: Striped Socks


I finished up this pair of socks for my husband this past week.  They took a long time to complete, but for no other reason then my lack of interest (smile).  They are great socks in the end and I know that he will wear them a lot.  Did I mention his favorite colors are brown and blue?  I am not sold that this brown and this blue exactly compliment each other, but they do provide a nice contrast and give a 'plain' sock some interest.


He asked for another pair after a) telling me that his Globe Trotters tend to slip down because the ribbing isn't tight enough, and b) confessing that he felted the last pair of socks I knit him in the laundry.

This pair should hold up - elastic enough with a an all around traditional rib pattern and sturdy enough for the washer and dryer thanks to KnitPicks superwash sock yarn Stroll, in Midnight Heather.

Friday, October 3, 2014

Pattern Test: The Messenger Bag


I am one lucky girlThis past month I was able to test sew a pattern for my friend Melissa Q. from a happy stitch.   I am not an accomplished sewer - very much still a beginner - but I am keen on adding new skills and giving this messenger bag a test run was a great experience. 


Overall it took under 4.5 hours to cut, prepare, assemble and sew the bag - not bad for something so incredibly functional, unique and awesome.  My favorite feature - aside from the slender, compact size and customized strap length - are the inside pockets.  Perfect for a phone, lip gloss, pens and your headphones.


As a beginning sewer I was a bit nervous about how it all might come together, but following Melissa's photos and clear directions made it very easy to pull off.  She provides lots of helpful hints along the way.

It is quite a professional looking bag and I have gotten lots of compliments on it already.  The lining looks wonderful and fits well.  The bag is also reinforced with interfacing, giving it the right amount of body and structure without any additional bulk.


The biggest compliment of all is that one of my older daughters (9yo) desperately wants to have this. "Mom, messenger bags are WAY cooler than backpacks," she says.  I have to agree with her on that.  Especially when it is this messenger bag we're talking about!


The pattern for this bag should be available in Melissa's Etsy store starting today.  Go pick up the pattern, find some fantastic fabric and sew yourself one.  You won't be sorry you did.

Wednesday, September 24, 2014

Hitofude and Murakami


The inspiration struck when I was about half-way through my very first Murakami novel, Hard-Boiled Wonderland and the End of the World.  It dawned on me to search for Japanese knitting patterns and off I went.  It had been awhile since I had been inspired with a new project - and this one just came to me.

I wound up with Hitofude and have just a half-repeat to get to the end of the arms.  The construction of this piece is incredible - what you see in the photo is half of a rectangle that reaches wrist to wrist.  I will eventually fold the rectangle in half the long way and seam to make two arms.  Whew.

This is an amazingly clear pattern so far and the knitting has been very, very enjoyable.  I am working it up with Madelinetosh Merino Light in scarlet.  A red knit for a red head?  I think I can pull it off.

The photos I have seen of the finished sweater are lovely (over 2,000 in Ravelry) and I hope to have this one done and off the needles by the holiday season.

Friday, August 15, 2014

FO: Quilts for Daughters #3 and #4

My other goal for the summer - aside from clothes for myself - was to finish two more quilts for my youngest daughters.  Building off the design and look of the quilts for daughters #1 and #2, I went with a stacked coin method again.  The prints are all from my stash but I did purchase cotton on sale for the binding.


These two quilts are very similar to each other, which was a happy accident.  The original two quilts I made in 2009 were on the narrow side so I set out to make these wider.  Each color block measures 4.5 inches by 7 inches.  In my over-zealous attempt I made too many vertical strips; so many that I only had to cut and sew one extra to get a second quilt.  So while I set out to only make one for my 6yo I also finished up a second one for my 3yo.  It is certainly too big for her toddler bed and has been tucked away in the linen closet for a year or so until she moves into a 'big girl' bed.


Something wonky happened towards the bottom of the first quilt (first photo) and I think it was because I pulled the backing fabric too tight when taping it to the floor to make the sandwich.  I caught my mistake for the second one and didn't have any trouble.  Luckily for the first one it seems confined to the second row only.

One back is all the same cloth (the waves on the far left in the photo below) and the other is as you see here - pieced with a few different pieces of fabric from the stash. 


The binding strips worked out great this time - I think after working on bias for armholes I really have the hang of machine sewing binding and bias on.  I hand stitched the backs, however, while catching up on episodes of "Suits".


My 6yo loves her quilt already and has been using it every night.  I think they are a success - and it is nice to walk by various bedrooms upstairs and see the quilts splayed out (but very rarely on their beds, smile.  They are kids after all.).

Monday, August 11, 2014

Crafty (Backyard) Camping Birthday

My oldest girls turned 9yo this past weekend.  They wanted a backyard camping sleepover.  My husband and I went around and around about whether to have a 'theme' or just go with a sleepover party.  Ultimately the theme idea won - if for no other reason than it helped to reign in ALL of the ideas that the girls had about their special birthday party.


I found this great camp cake recipe/idea online and did my best to create one similar.  I think I did pretty well.  In fact, making and decorating the cake with the girls was one of the highlights of the entire party planning experience.


I picked out two crafts for the girls to do as well.  The first was a photo holder: A wooden cube that could be decorated with camping signage, and then add a groove in the top that can hold a photo.  We all loved doing these!  I found the camping signs online at Etsy, each girl got her own sheet to cut from and we used Mod Podge to secure the 'signs' to the blocks.  My husband made the blocks and then used a saw to cut the groove.  Each girl went home with a couple of blocks and one photo holder.  I kept the extra blocks until the next day and then made our family a set of blocks for camping.  I can imagine using them for so many things when we are in the great outdoors - story cubes, conversation starters, etc.


The other craft was creating shadow puppets of northern woodland animals.  The girls (painstakingly) cut them out and taped each on to a chopstick.  They practiced shining the images on the side of the tent with their flashlights (a party favor) and then my husband made up a story and they acted it out.  The whole idea/production turned out even better then I ever could have imagined.  The animal shapes were free templates from a designer on the internet - there are thousands out there to choose from.


We roasted hot dogs over a fire pit for dinner with corn on the cob, watermelon and chips.  We did the crafts right afterwards, then were inside for a movie.  Then outside again for sleeping in the tent.  Luckily the weather was on our side for the weekend.  The girls all slept really well (until 8a!) and after breakfast and some playing it was time for the girls to get picked up again.  It was a great party and after the guests left my daughters ran to me with hugs saying that the party exceeded every dream they had about it before hand.  A very happy Momma moment.

This was our first foray into a friend party - up until now, for all our girls, we've kept these celebrations close with just family.  It was a lot of work to pull of the party for kids but very much worth it.  And the party was in touch with our family 'vibe' which made it really enjoyable.  I even got to craft/create along the way.

Thursday, July 31, 2014

Personal Summer Sewing Challenge


This summer I set a goal of sewing clothes for myself.  I was unsure how the start to the summer would unfold and we found ourselves afloat for a couple weeks due to a death in the family, bad weather (tornadoes) and no summer camp schedule to speak of.  We were adrift for a bit, but I had dreams and thoughts of sewing clothes to keep me anchored (and sane) and therefore the kids happy.  When I was able to schedule them with an activity I slipped away to my own activity and peace reigned for at least 20 minutes at a stretch.


I am very new to sewing clothes for adults.  I have made kids costumes here and there and done some quilting, but never anything that required measurements and fit.  I really didn't know where to start.  I reached out to a friend, and the internet, and then dove in.

Two tips I picked up pretty quickly were: 1. Make a (wearable) muslin out of cheap fabric and 2. Pick the pattern size based on your measurements, not your clothing size.

My first three patterns to try were: 1. The Wiksten Tova, 2. The Washi Dress and 3. The Schoolhouse Tunic.

Coincidentally my neighborhood sewing shop (The Sewcial Lounge) was offering a class on the Wiksten Tank which I also signed up for.  What a great experience!  I learned so many little tricks and tips that I felt quite accomplished when I was done.  I learned how to sew in bias for the armholes and use a sewing gauge.  And while it wasn't a pattern I had initially picked out for myself it made a great top and starting point for my other projects. 

My first tank (top left in first photo), that I made during the class, is a wearable muslin out of generic quilting cotton.  [I don't particularly care for the fabric pattern, but it was a good trial run and now has been worn camping and weeding the garden a few times this summer.]  I walked out of the store wearing my new tank top and the confidence to move on to something a bit more ambitious. 

The other three tanks I made to add to my summer wardrobe and I consistently wear at least 2 each week.  They came together very quickly and in about 4 separate 20-minute windows (cutting, sewing, armholes and neckline/serging seams).  The blue is from some Ghanaian fabric a friend brought home for me from travels abroad, the yellow is a quilting cotton that is softening after many washes, and the voile is a lovely Anna Maria Horner print that I found on sale.


Once I had the tank down I moved on to the Washi Dress.  My first go at that was not good - I made a dress entirely too big and learned the real value of making a muslin.  My second attempt at a wearable muslin was much better.  I opted for the tunic length, reasoning that I would save on fabric while getting a better fit and then could do the dress next.  The teal/green tunic above is out of quilting cotton from my stash and I do wear this top out in public.


Then came the dress, made from a cotton voile from JoAnn fabrics.  It turned out about as wonderful and I could have expected for my first dress.  The shirring is not straight and I didn't bother to change the thread color for the facing.  But it fits reasonably well and the hem is straight.  I am excited to make another (with the notch and sleeves this time) in another lightweight fabric.  Maybe a soft linen or another voile.  I love the sleeveless look for this one too.  A great all-around summer sun dress.


Two other details to note are the serged seams (!!) and 'handmade' tags.  The serger was a gift from my husband this spring and I am in love with it.  The finished seams make all the difference in a wearable garment.  And the tags were a gift from a dear friend.  They add the perfect touch this this first set of clothes.


I have taken to calling these items the Summer '14 collection.


And with August starting tomorrow I only have a few weeks before we roll over into the Fall '14 collection (smile).  I have yet to tackle the Wiksten Tova - I tried it out in and the muslin is too big.  Back to the cutting table for that one.  And I also worked on a muslin for the Schoolhouse Tunic.  This one fits well everywhere except just below the bust, where it is too tight.  I am puzzling how to extend the pattern piece to give myself a bit more 'below bust ease' so it all comes together well.

Monday, June 2, 2014

FO: Pixel Portrait - Family


Over Memorial Day weekend I went from idea to finished portrait.  Relying heavily on Martha Stewart's tutorial and clip art I came up with a rendition of our family on graph paper.  Check here for details. 


After sketching the first draft I went back and cut and taped edits all over.  Graph paper is awesome to work with for that very reason!

The final product shifted a bit still - no chickens, I changed up some of the accessories, and I still have to add our family name.


I was able to use many different colors, but tried to use the same color at least twice in the portrait to keep a sense of unity.  I also threaded a gold strand in the twins' hair to make it a bit different from Dad.  

I can't believe how darn cute this turned out...and check Etsy and Google Images for tons of other great ideas for how to customize it even more.  

Thursday, May 22, 2014

FO: Four Socks


Is this half of four FO's or four of eight FO's?   I suppose it doesn't matter...I have four socks and not a matching pair among them.


Three different heel treatments...


Two basic styles...


And a lot of colors and patterns that do not coordinate well together (at all).

The blue/white stripes are for one of my oldest girls, the orange sock doesn't have a recipient in mind yet, the red/yellow/white is a hand-dyed yarn of my own making and my same oldest daughter has claimed them for herself - she'll have to wait until her feet grow at least another inch though.  And that last really big sock is for my husband.  As previously mentioned, the lovely fawn color mock cable socks I knit him earlier this year are now mine due to felting in the front-loading washing machine.  I felt guilty and immediately cast on for another pair for him.  I couldn't bring myself to knit another pair of brown socks just yet, however, so I choose a midnight blue and threw in some brown stripes for good measure.

Now its time to buckle down and get the other four socks knit - maybe I can accomplish this by the end of the year?!